
PCBA Prototype to Production: A Practical Guide for Hardware Companies
Helly Liu
8/8/20262 min read

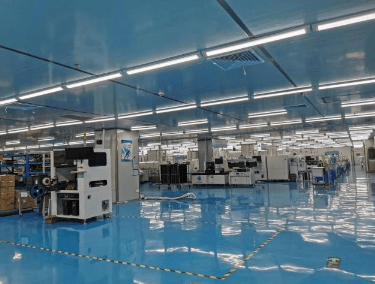
Turning a new electronic product from an engineering concept into a reliable manufactured product involves several important stages.
For many hardware companies, the process begins with a small number of PCBA prototypes and gradually moves toward low or medium volume production.
Understanding this process can help reduce development time, manufacturing risks and unnecessary costs.
Step 1: Prepare the Manufacturing Files
Before requesting a PCBA quotation, manufacturers normally require several basic files.
The most important documents include:
Gerber files
Bill of Materials (BOM)
Pick-and-place file
PCB specifications
Assembly drawings
Testing requirements
Providing complete information helps the manufacturer evaluate the project accurately.
For more complex products, additional information such as firmware programming requirements, test procedures and mechanical drawings may also be required.
Step 2: Engineering and DFM Review
Before PCB production begins, the manufacturing team should review the design.
A DFM review can identify issues such as:
Components positioned too close together
Incorrect footprints
Insufficient solder mask clearance
PCB panelization problems
Difficult-to-solder components
Component availability issues
Finding these issues before production is much easier and less expensive than discovering them after assembly.
Step 3: Component Procurement
Once the design is confirmed, the next step is purchasing electronic components.
Component sourcing can be one of the most time-consuming parts of PCBA manufacturing.
Manufacturers must manage different lead times for ICs, connectors, passive components and other materials.
For projects with obsolete or difficult-to-source components, engineers may also recommend suitable alternatives for customer approval.
Step 4: PCB Manufacturing
The bare PCB is manufactured according to the customer's design requirements.
Depending on the application, specifications may include:
Number of PCB layers
Copper thickness
Board thickness
Surface finish
Impedance control
Via structure
Material type
After PCB fabrication, the boards are inspected before assembly.
Step 5: SMT and Through-Hole Assembly
Most modern PCBAs use Surface Mount Technology (SMT).
The typical SMT process includes solder paste printing, component placement, reflow soldering and inspection.
Through-hole components may then be assembled using DIP processes or selective soldering depending on the design.
Step 6: Inspection and Testing
After assembly, PCBAs should be inspected and tested according to the project requirements.
Typical testing methods include AOI, X-ray inspection, ICT and functional testing.
Functional testing is especially important because it verifies whether the assembled board performs according to the intended product design.
Step 7: Pilot Production
After prototypes have been tested successfully, many companies move to pilot production.
A pilot run may include 50, 100, 500 or several thousand units.
This stage helps verify:
Manufacturing consistency
Production yield
Testing procedures
Product reliability
Supply chain stability
Problems discovered during pilot production can then be corrected before larger-scale manufacturing.
Step 8: Low and Medium Volume Production
Once the product design and manufacturing process are stable, regular production can begin.
For many industrial, IoT, medical, automation and specialized electronic products, annual volumes may remain relatively moderate.
This is why flexible PCBA manufacturing is important.
Jakosmart supports customers from prototype builds through low and medium volume production, helping reduce the need to change suppliers as projects grow.
Our goal is to provide a practical manufacturing solution that combines engineering support, component sourcing, PCB production, assembly and testing under one supply chain.